I decided that I needed to up the Battery AMP hours for my new truck camper
from dual Group 24's, to dual Group 31's. The Snowriver camper has a very
user friendly battery box design, that allows the owner (me) to install larger
batteries in the same space as smaller batteries. If you have looked at
very many brands of new and older brands of truck campers, you will see that
they usually only allow you enough room for one battery, and usually fit a Group
27 or less at that.
So, I set out to find a battery tray that can support two heavy (60lbs each)
batteries. I wanted the luxury of being able to service the water levels
while the batteries were still in the camper, and not have to lift them out to
do so. I did find one shelf that would have worked, but the cost was way
out of my desired level, so I get to design and build my own.
With some help from Mark and his new (used) sheet metal brake, and another
friend Mike that does powder coating on the side, I was able to design and
finish exactly what I set out to do. Here are the pictures of the final
product. I forgot to take pictures of the actual start to finish,
but the end result is obvious.
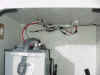
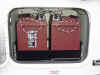
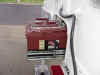
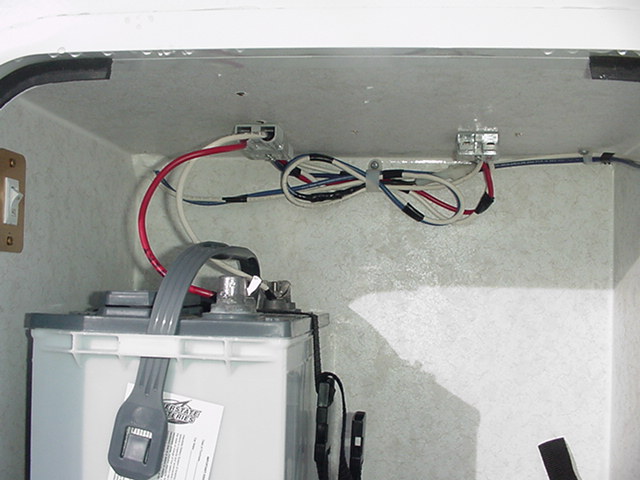
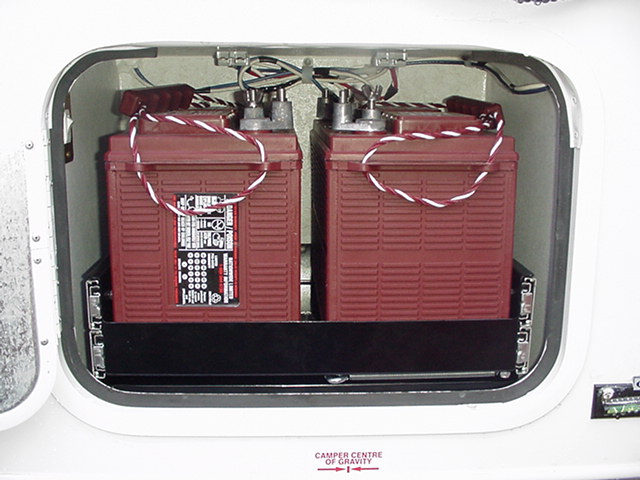
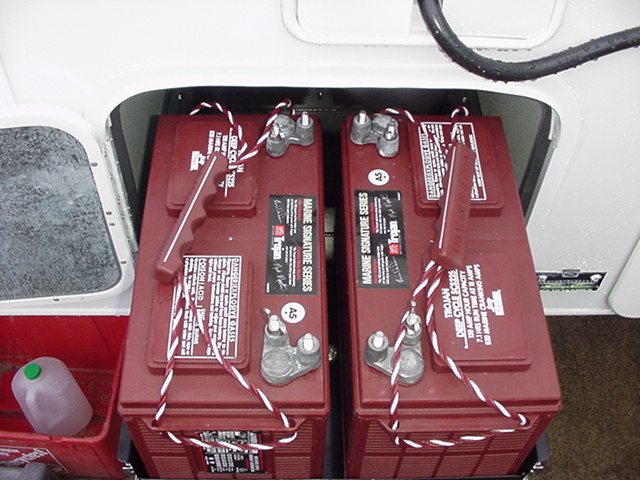
This is what I had to start with, only there were two of these small Group
24 batteries. Note the use of Anderson connectors that I added.
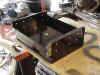

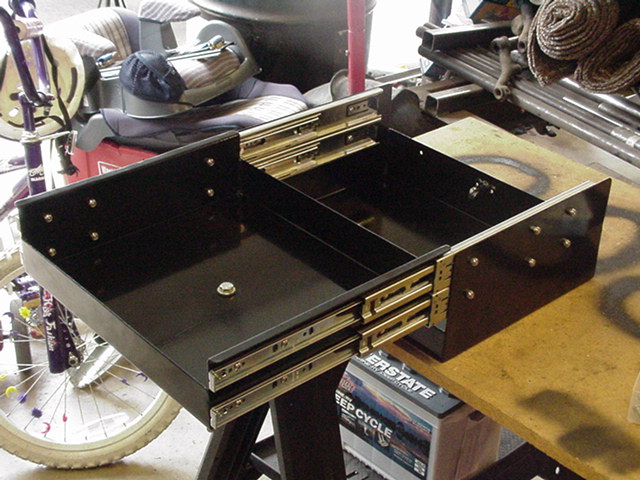
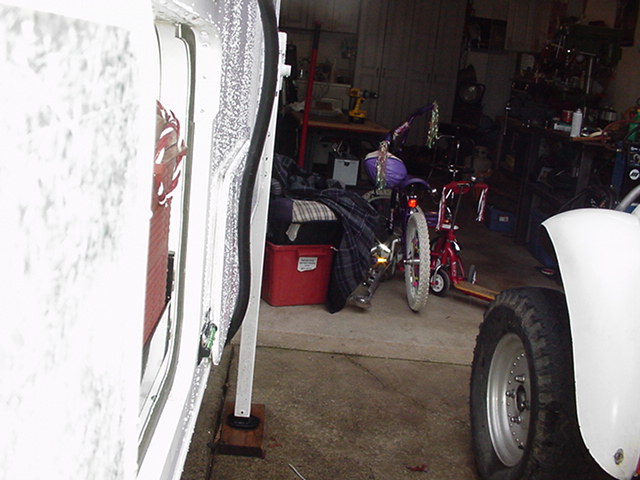
Here it is closed and then the full extension is 12" out. Perfect for
a 13" long battery.
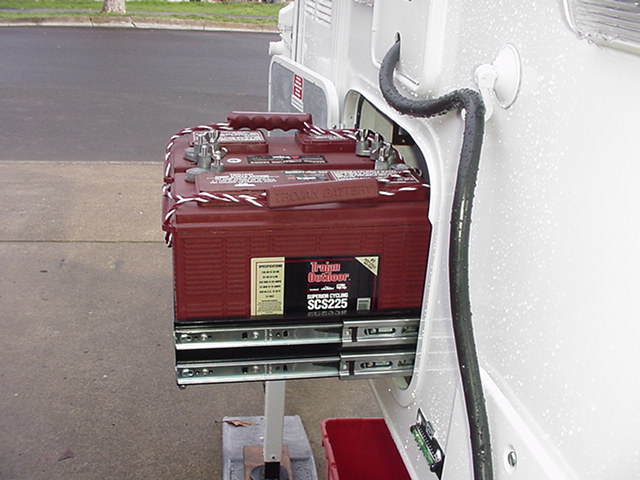
Bolted into place, and then extended out to show the workings.
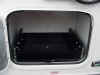
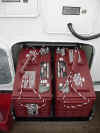
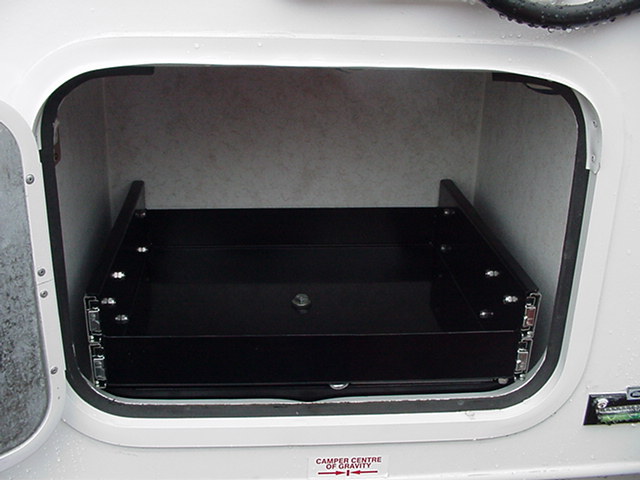
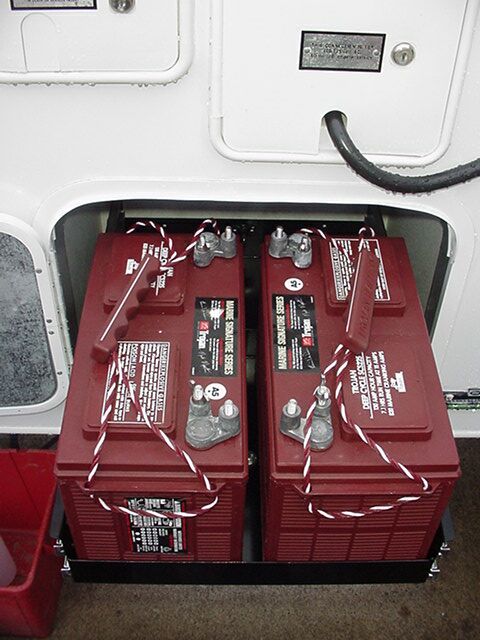
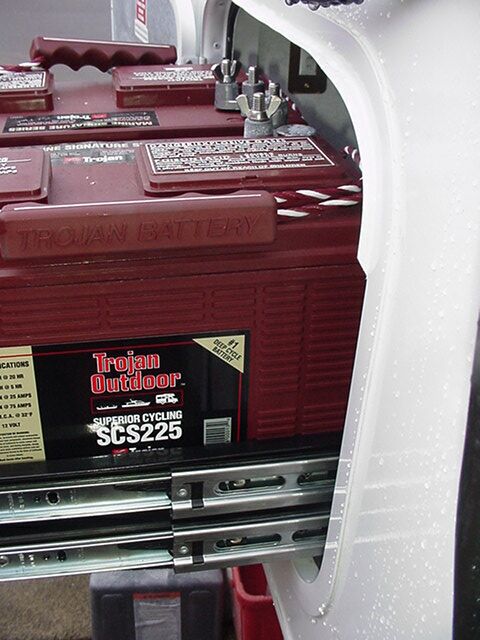
Batteries placed in the tray and the tray locked into place, the door will
just close and all is good. The batteries actually fit better if put in
the tray sideways. I may go ahead and flip them around and make sure
that the furthest battery back has the water caps towards the center.
I just like the looks of this way better.

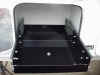
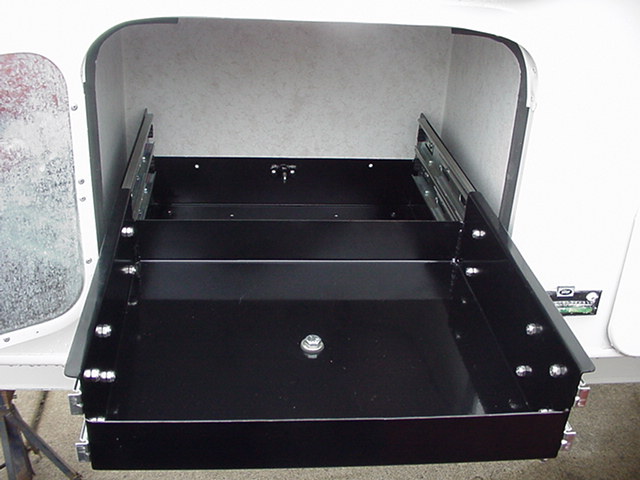
Here the batteries shown extended pretty much all the way out, and in the
last picture, it is clear that reaching the water covers will be a cinch.
Now I just need to install the Anderson connectors from the other batteries
and be done!
Oh! And the grand total in part and coating was a whopping $27.
The full extension slides are rated at 100lbs a pair and each battery is 60 lbs,
so it all worked out great.
A big thanks to Mark for the use of the brake, ( he really needs to update
this website with pics of that new shop, BTW).
And a thanks to Mike for Powder Coating this for me. Ya did a great job on it!
Craig


