Tubing Clamp
Home Up Products Projects How To Events Photo Album Other Fabrication Our Other Toys Product Reviews For Sale Links Guest Book Contact Us

Home
Up


    If you have any questions regarding this Tool Project please E-mail "INSAYN".


              cagerear08.JPG (103023 bytes)   cagefront08.JPG (88241 bytes)   cagefront07.JPG (100852 bytes)                                

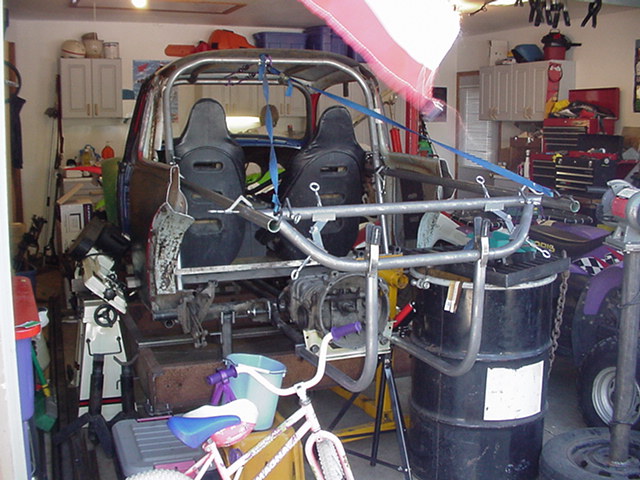
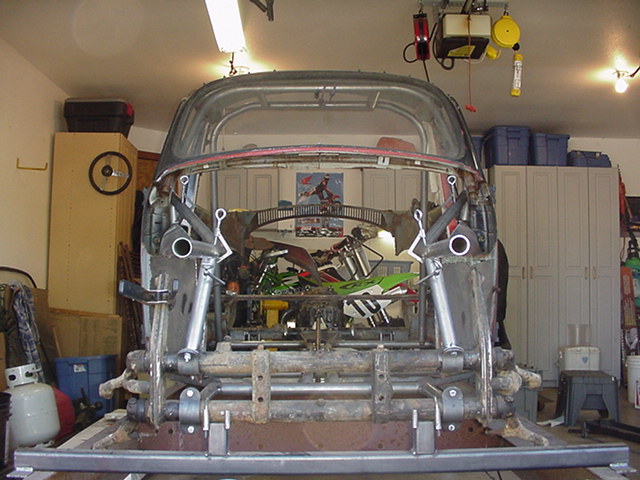
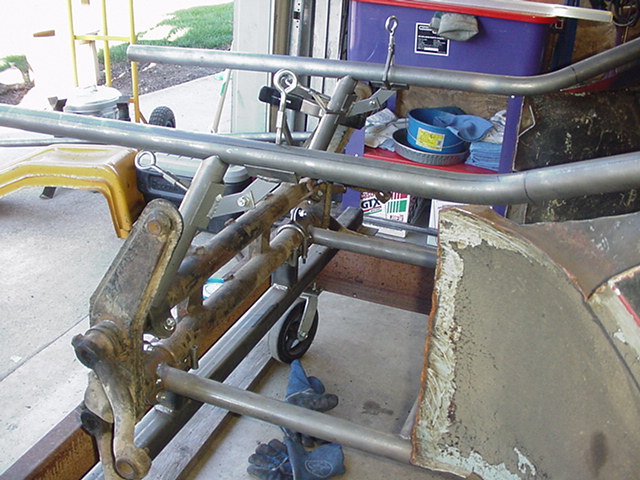
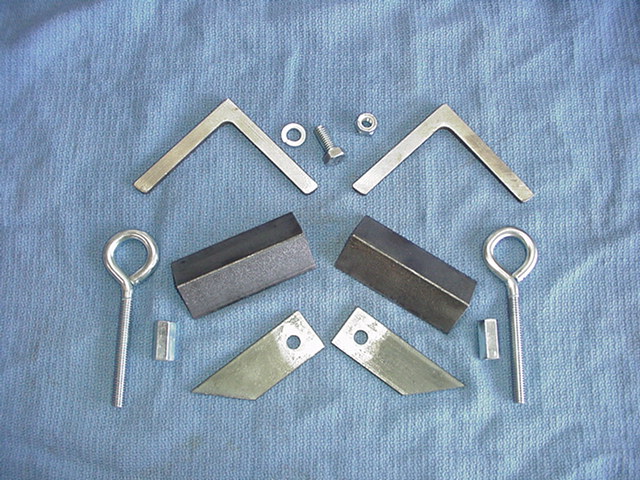
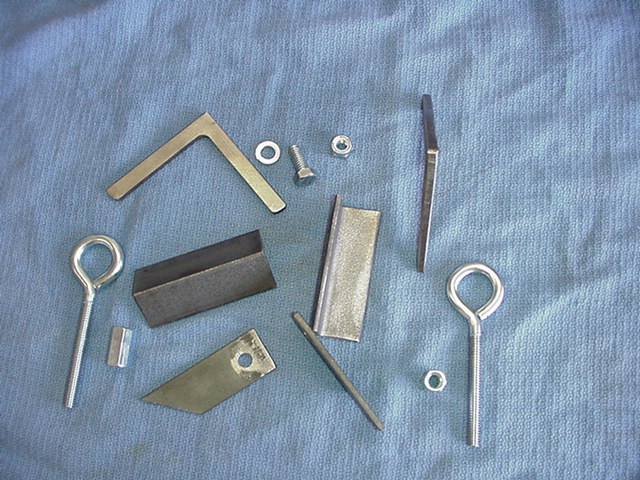
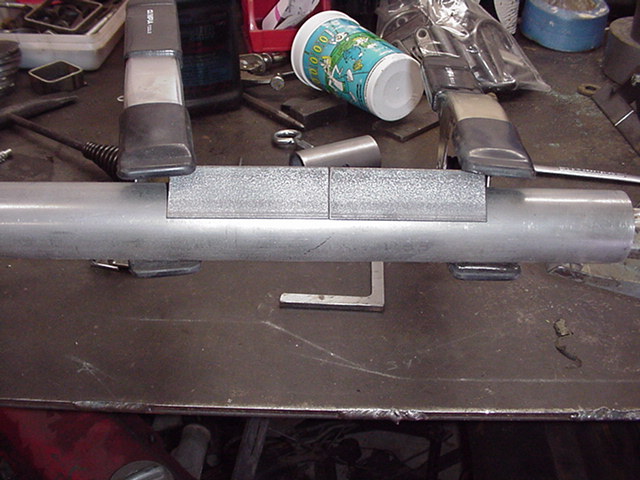
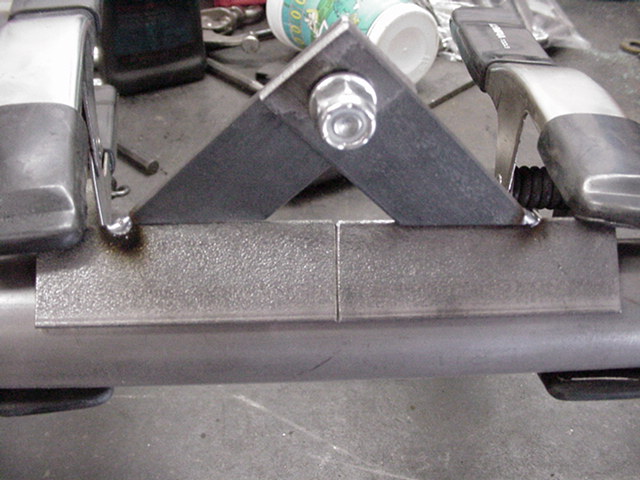
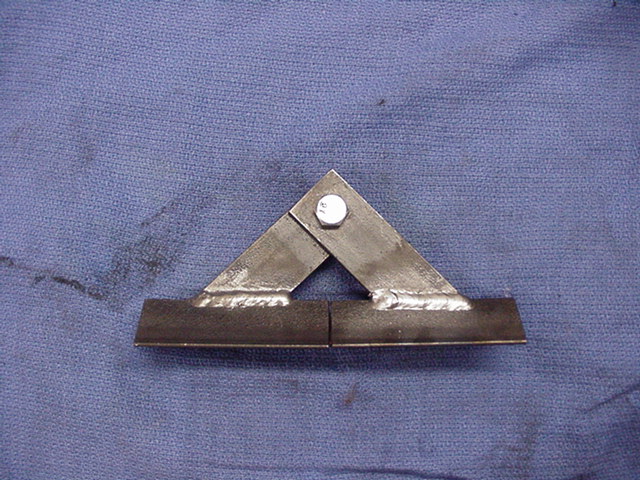
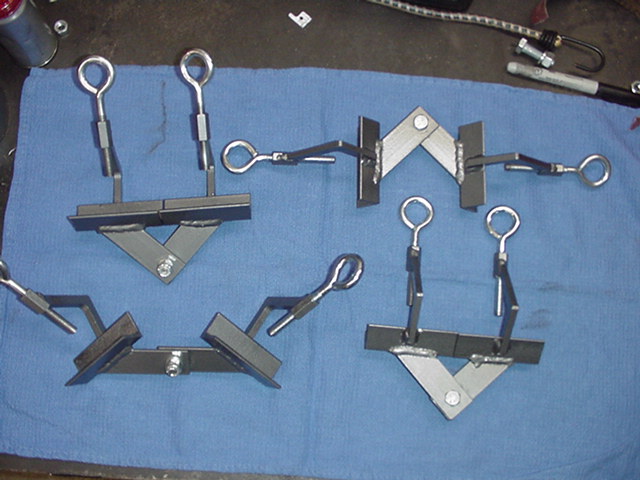
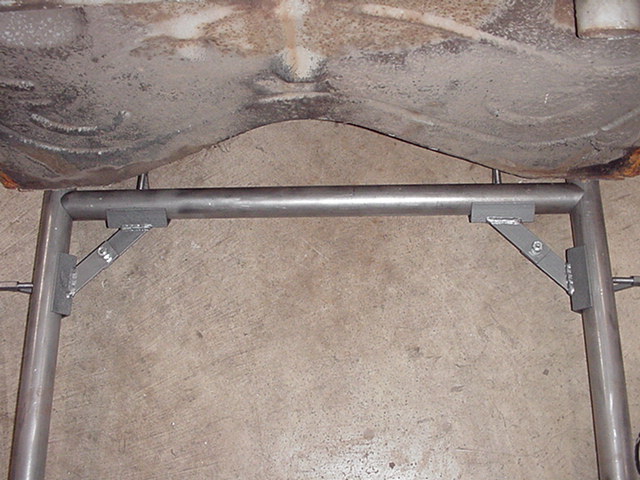
So here's the deal:  In my quest to build a full tube chassis for my baja bug I decided to stock up on the tools most suited for the job.  However, I am one of those guys that looks at something made of metal and, questions the price tag.  I cannot see spending nearly $20 each for a simple tool like a tube clamp.  In fact, I cannot fathom shelling out $10 for a pair of them.  So, with the trusty thinking cap on, I pondered my own variation of the tube clamp.  I was able to successfully build 6 complete tube clamps for around $15 in hardware, scrap metal pieces, and paint.  Most of the cost was from the "eye" bolts.

Anyone that has moderate fabrication skills, and access to basic metal can make their own set.  You will also need various nuts and bolts.   I decided to use an eye bolt, and long HEX nut, for the screw down.  And used a simple bolt, lock washer, and Nyloc nut, for the pivot.   

Look closely to the picture below, see if you can figure out what I used for the 90 degree arm.  

tubeclamp01.jpg (120875 bytes)        tubeclamp02.jpg (115794 bytes)
The angle iron used for resting the tube in, is simple 1"x1"x1/8" Angle iron cut at about 3" lengths.  The pivot parts are made of 1"x1/8" Flat bar and cut to about 3" also. Then one end of each piece of flat bar was trimmed to 45 degrees, the other end had a hole drilled in to it.   


tubeclamp03.jpg (80620 bytes)        tubeclamp04.jpg (75837 bytes)        tubeclamp05.jpg (114581 bytes)
Here is the basic assembly route that I took.  Unfortunately I did not get pictures of when I added the uprights with the eyebolt camp.  If you decide to tackle the project yourself, just take time and build a simple jig to hold things square when getting everything tacked together.


tubeclamp06.jpg (72892 bytes)        tubeclamp08.jpg (91114 bytes)
Bamm!  There they are!  I set them up in different configurations to give you a better view of them.  Also, here they are being used already on my baja bug, to hold the cross section of my tube chassis together.  cc


For problems or questions regarding this web contact .
Last updated: February 27, 2014.

All content on this website belongs Blind Chicken Racing and it's employees.  All use without prior permission is expressly forbidden.  Violators will be prosecuted.